Showing posts with label Health and Beauty. Show all posts

Tuesday, February 28, 2017

Build Your Own Body Scrub

There are few luxurious, indulgent beauty products quite like a good body scrub. Retailers and spas have been cashing in on this fact for years!  Exfoliation is recommended 1-2 times a week to scrub away dead skin cells, encourage cell turnover, and keep your skin looking fresh and youthful. They make great gifts too, and can suit any budget. And that's the secret!  It doesn't have to cost you big bucks. I'm here to set you free! Free to customize and design your very own body scrub for that silky soft skin that has always seemed so expensive to come by.


Making your own body scrub is very simple--taking only 2-3 ingredients you probably already have--not to mention it's economical! 

All you need to make a body scrub is a coarse solid plus a carrier oil, and if desired, essential oils to target skin care, or other embellishment. I have found a good ratio is the following:

1 tablespoon of carrier oil 
1/4 cup of solid base
2-6 drops of Essential Oils

That give you a nice, spreadable texture and enough oil to condition and moisturize your skin, without being so much oil that it seems soupy.

Now, on to customizing!


The first thing you need to choose is which scrubby base you want. Choose one that meets the quality and texture standards you are looking for.

Salt Scrubs:
  • Himalayan pink salt--pretty, course, and filled with minerals that are great for your skin! It is a little more expensive and would make a really lovely gift.
  • Epsom salts--So accessible, aka, affordable! Moderately coarse, made of soothing magnesium
  • Straight up table salt-- cheap, most fine salt texture 

Sugar scrubs:
  • Sugar in the Raw--most coarse sugar, more like salts, but sweet smelling!
  • Cane sugar--More coarse sugar, although finer than -in the Raw and most salts
  • Brown Sugar--sweet smell, rich color, fine texture
  • Powdered texture--Super fine texture, making a very gentle scrub for sensitive skin

Coffee Scrubs:
IMO, coffee is the most luxurious scrub! Remember to pair oils cautiously, since it has such a strong and distinctive scent on its own.
  • Fresh coffee grinds--full of antioxidants; caffeine can (temporarily!) reduce the appearance of puffy eyes and cellulite; you control texture with the grind
  • Used coffee grinds--some of those good qualities get filtered out in to the coffee you drink, but this is a good way to upcycle

Don't forget you can mix and match, ie, coffee + cane sugar or Himalayan salt + brown sugar--get creative!


A carrier oil is a clean, ideally organic and cold-pressed, plant-based oil. This step may take a little trial and error, especially for a facial scrub, to see which one best suits your skin type. All of these oils have some comedogenic risk (aka, they could clog your pores), but the right one for you will work with your skin, not against it! I have combination skin that has been acne-prone for more than 20 years and my sweet spot is grapeseed + coconut oils. Keep in mind that the skin on your body is different and probably much more tolerant than the skin on your face.

Here is a conservative list of some more economical, easy-to-come-by carrier oils, but don't be afraid to branch out from these!

Coconut Oil:
  • Widely available, has its own cleansing properties, but a higher comedogenic rating
  • Can feel heavy, but moisturizing for dry-normal skin
  • Beware for texture! Its melting point is around 75℉, so if it's cold where you are, it may turn solid
  • Fractionated coconut oil is an option, and has been altered to stay liquid at cooler temps. Keep in mine coconut oil has a relatively strong scent, if that factors in to your choice!

Grapeseed Oil:
My personal favorite for my face.
  • Thin and light, ideal for normal-oily skin, with some nice cleansing properties and Vitamin E
  • Sometimes available in grocery stores

Jojoba Oil:
  • A perennial favorite for normal skin
  • Gentle and often preferred for sensitive and/or aging skin 

Olive Oil:
  • Widely available (probably already in your kitchen!)
  • Moisturizing for dry skin


Similar to carrier oils, there is no shortage of choices for essential oils to use in a body scrub. You could simply choose your favorite smell, or explore their therapeutic properties to choose one that meets your needs. Again, here is a very brief list suggestions for essential oils with both a pleasing fragrance and excellent therapeutic value for skin care.

Lavender:
  • Pretty, floral, slightly spicy scent
  • Go-to for all things skin! You really can't go wrong with a good lavender body scrub!

Frankincense:
  • Rich and spicy, luxurious and indulgent
  • Excellent for skin care, especially dry or aging skin

Geranium:
  • Bold, floral scent
  • Balancing for all skin types (one of my preferred favorites for my combo skin)

Purification:
  • Clean, refreshing scent from lemongrass, tea tree, and rosemary oils
  • Cleansing for oily and acne-prone skin

So, what kinds of combinations can you make?
How about Epsom salts with coconut oil and lavender? Maybe sprinkle in a tablespoon of dried rosemary for color, texture, and aroma...
Or maybe mix up organic brown sugar with grapeseed oil and geranium?
I know! Fresh, fine grind coffee with light jojoba oil and frankincense! See, the options really are endless... 

I hope this will spark your creative juices to whip up a body scrub that is just right for you! Go raid the pantry and get to work!

Sunday, November 13, 2016

Luxurious Lip Scrub

Are you on the hunt for a quick, simple, yet luxurious gift idea? I may have just the thing! Lip scrubs are simple to whip up and customize, but in the stores, you'll have to go to a higher end beauty store to find one.

A lip scrub, if you have never tried one, is very easy to use. Simply rub a bit on your lips with your finger to exfoliate (just like a body scrub), and rinse off. It is perfect for dry, winter lips! Are you having issues with your lipstick looking flaky? Give this a try! Just be sure to follow it up with a moisturizing lip balm, and you'll be ready for mistletoe!

This homemade lip scrub, with Young Living oils, at least, is even safe to lick off! (Not sure if yours are safe to use? Check the label! I recommend using essential oils that say, on the label, they are safe for internal use. Ya know, since you are using it on your mouth!)

Here is my favorite recipe:

1 tsp organic cane sugar
1/2 tsp organic olive oil
1/4 tsp honey (don't bother with a measuring spoon, it's just a tiny squirt)
2 drops your favorite essential oil for lip care

Mix everything in a small glass dish. This batch fits nicely into a .25 oz lip balm jar.

Now, which essential oils should you use? I love peppermint oil in this recipe! It's cool, refreshing, and so delicious! Grapefruit is a popular choice, but citrus oils make my lips feel kind of funny (that is NOT true for everyone! If you love a citrus flavor, give it a shot!) Lavender is a nice choice for anything skin-related.  And frankincense is especially nice for aging skin and would make for a particularly indulgent treatment.

For a gift, pair it with a nice, homemade lip balm in a complimentary flavor. I love this gift for the young ladies in my life.

In just minutes, you and those you love, can enjoy soft, healthy lips all winter long!

Monday, October 17, 2016

Achy Body Spray

My family went on vacation last week!  Woohoo! (one reason I recruited some blogging help!) Well, it was more of a staycation, really, but involved a hotel room, nonetheless. And a hotel bed. And a hotel pillow. After riding in the car... Do you see where I'm going with this??? Stiff neck, achy back... Those pesky vacation ruiners weren't going to put a damper on my relaxation! I made sure to bring my Magnesium Spray. It is just the trick for those kind of everyday, ain't-as-young-as-I-used-to-be, tight and angry muscles. And the best part is it is easy to make and it works fast! With one of the peak travelling seasons nearly upon us, I felt obligated to share!

I got inspired by my old friend and DIY guru, Sherri, at Overthrow Martha. She has a wonderfully simple and economical recipe there to make your own magnesium oil, which is the base for this recipe. She also tells you all about why you need it and how you probably aren't getting enough of it in your life. Magnesium is great stuff! It's the active ingredient in epsom salts that make your bath so relaxing. It's so soothing on tired muscles! It does all kinds of amazing things for your body. I used a magnesium supplement when I was pregnant a lot! My doctor recommended it to help manage some normal pregnancy symptoms and it worked very nicely. It was a powder that dissolves in water. You drink it like a tea. But it can have some of those relaxing effects on your digestive system, which is actually helpful when you're pregnant! But a lot of people don't like to use it orally on a regular basis for that reason. A topical spray is a good alternative to get the benefits to your body while bypassing your tummy.

To make your own magnesium oil that you can spray topically, all you need is magnesium chloride flakes and water (equal parts). Once saw this, and knowing how to make a basic essential oil spray, I thought it was the perfect opportunity to inject some essential oils for some extra power! My top choices are PanAway and Copaiba. 

PanAway is an exclusive blend from Young Living of wintergreen, helichrysum, clove, and peppermint. It is specifically designed to support your musculoskeletal system with naturally occurring compounds like methyl salicylate and menthol. Copaiba is a single oil that comes from resin of trees native to the Amazon. It's known for supporting the body's natural response to an irritant and is very soothing! It is also a magnifier for other oils, supporting their natural effects. 
Put all those things together, and you've got a winning combination! Like throwing the kitchen sink at your shoulders!

So, here's how you do it!
Cover the bottom of a 1 oz spray bottle with magnesium flakes (1-2 pinches) 
Add 15-25 drops of PanAway + 8-15 drops Copaiba (I use this spray more as-needed than everyday, so I go on the stronger side)
Swirl to combine
Fill about half way with warm water, cover with your finger, and shake to combine
Top off with Sherri's Magnesium Oil, put the top on, and again, give it a little shake to combine everything

Then, all you have to do is spray it on what ails ya! My neck and shoulders get a lot of this spray! As does my lower back area. I do about 50/50 water to Mg oil here for 2 reasons: one is that I use more magnesium flakes to start with. I don't want to overdo it with the magnesium. But also, when the spray dries, it leaves some of the salt (as in chemical salt, not table salt), residue on your skin and it can feel sticky or even cause some mild skin irritation. I don't love that, especially using it around my hair. So, I dilute it more. You could certainly flex that ratio in either direction. 

Now, if you don't have PanAway and Copaiba (which I highly recommend, and happen to both come in Young Living's Premium Starter Kit), there are many choices to use in this recipe! Anything you like to use on sore or tired muscles would fit the bill: lavender, peppermint, eucalyptus, wintergreen, pine... there are lots and lots 'o choices! 
Stay loose and feelin fine! 
(forgive me, I'm still recovering from vacation ;) )

Tuesday, September 27, 2016

Steam Tent with Essential Oils

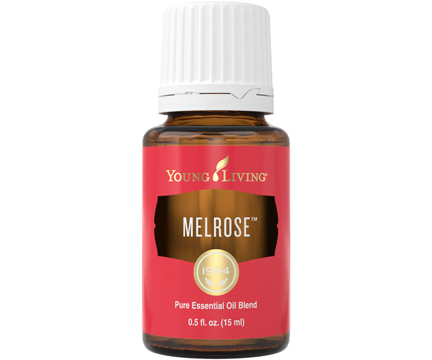
Have you ever tried a steam tent? Have you ever heard of a steam tent? Well, it's a very easy technique using steam to carry essential oils. It can be a great tool to support your respiratory system or your skin. The steam itself opens everything up, pores, sinuses, ect, then, a cleansing or detoxifying essential oil can go to work! My favorite essential oil for tenting is Melrose (a proprietary blend from Young Living with 2 varieties of melaleuca, including tea tree, and rosemary), but there are lots of great choices! Watch my brief demo showing you exactly how it's done!

Remember, as a word of caution, to remove contact lenses! Essential oils and contacts don't get along well :) Also, for best results for your skin, remove make up first.

Want to get your hands on those pure, clean, top quality essential oils? I only use the best, including those exclusive blends, and you can too here!


Saturday, September 3, 2016

DIY Foaming Soap

Did you hear? The FDA has banned 19 "antibacterial agents" from commercial soaps, basically saying that they do more harm than good! The problem is really two-fold: first, it drives bacterial evolution leading to antibiotic-resistant strains of bacteria, and second, it kills off the good bacteria that your body needs to maintain healthy balance. So, in light of this information, maybe now is the perfect time to be more confident embarking on making your own soap, knowing that you'll still get plenty clean!

The easiest place to start is with foaming soaps. I love foaming soaps. I've been using them for years! I always felt like they lasted longer. When I started on my essential oil and DIY journey, I found out how easy it is to make myself. I also found out that they are mostly water! I really HATE paying for water, including watered down products! So, now, I make it, of course!

I love that I can change it up and customize it. It's a basic formula, but I can add different oils, carriers and essential, to make exactly what I need at the time, like to meet the needs of my skin in summer vs winter, or what I prefer, like spicy in the fall vs fresh in the spring. I will alos add, that since making my own this way, I don't use lotion as much. Since it is made with oils, it isn't as stripping and harsh as traditional soaps, so my skin loves this recipe!

To make your own, first, you need to start with a foaming pump. I bought some from Abundant Health (I love the little travel size!). I've also recycled empty ones from store-bought foaming soap. If you're going to recycle, be sure you strongly dilute any essential oils used, since the grade of plastic is not verified. I also avoid citrus oils in my recycled ones since those seem to be more strongly degrading to plastics.

The next thing you need is a concentrated soap base. I love castile soap for this! It is combination of water, and a number of saponified oils, including coconut, olive, and jojoba. It also has a small quantity or potassium hydroxide necessary for the saponification reaction (basically the mechanism that makes soap grab dirt and carry it away.) You can get it pre-scented with natural fragrances, but I like to add my own. And since I use it for multiple things, I like my soap unscented.

In your bottle, combine about 2/3 water and 1/3 soap, and you could be done there!

If you like, you can add some things first...

  • vegetable glycerin
  • vitamin E
  • extra carrier oil of your choice (probably steer clear of regular coconut oil since it can go solid in cooler temperatures)
  • essential oils for skin care (Some of my favorites include, but are certainly not limited to lavender, frankincense, tea tree, Purification, Thieves, Melrose... the list goes on and on!)

Check out my video demo, including my facewash recipe, showing you how easy it really is!


Want to get extra clean this month??? Young Living is offering a FREE bottle of their exclusive, super concentrated Thieves Laundry Soap to new wholesale members for enrolling in September! Learn more about what it takes to get started today here

Monday, August 29, 2016

Healthy Scalp Spray

If you have kids going back to school, chances are you want their scalp to stay healthy! I guess you'd want their heads to be healthy no matter what, but going back to school exposes them to all kinds of pesky annoyances that you don't want them bringing home. That would mean keeping them home and doing tons of laundry... so let's avoid that hassle this year and keep that scalp, well, healthy!

For my school-aged child, I use this simple spray on her hair in the mornings before school using essential oils:

pinch of baking soda
15 drops tea tree essential oil
10 drops lavender essential oil
5 drops peppermint essential oil
1 tbsp warm water
1 tbsp witch hazel

1 oz spray bottle
small stainless funnel (will make filling that bottle a little easier!)

Put a pinch of baking soda in to a 1 oz spray bottle. Add in your essential oils (if you see oil swirling around the bottom of the bottle, add a little more baking soda. You want the soda to absorb the oil). Pour in warm water in. Cover with your finger and shake to dissolve the baking soda. Top with witch hazel and close it up.

I spray the hairline, 2-3 spritzes to get all the way around, a spray on the crown, then lift about half the hair up and get one good spray in the middle there.

Super simple, clean, and healthy!

I will note that in my home, and especially around my kids, I only use top quality, unadulterated essential oils! Learn more about what I use here!

Thursday, August 11, 2016

Hair Conditioning Serum

Hey! How's the summer treating your hair? How about that beauty routine in general? A little rough around the edges? I'm going to share a slightly embarrassing moment I had several months ago...

Around Christmas, I started making the switch to a natural hair car routine, including a DIY shampoo followed by and apple cider vinegar rinse. I'll get to those another day. Apparently, it was not doing the ends of my color-treated hair any favors. I hadn't been in for a trim in a few months and when I finally went to get it cut, the girl asks me if I flat iron it often... I don't :( My poor ends were not handling the transition well! So, solution time!

I came home and started looking into essential oils that are good for your hair and I found a laundry list! Many tout benefits for your scalp, but having oily-prone skin and hair, I didn't want to go for a full-on oil application, either as a deep conditioner or regular conditioning treatment, so I was more selective. Here is where I landed:

Olive Oil--it's moisturizing and contains Vitamins A and E, leaving you with strong, shiny, manageable hair. Many carrier oils would be good in this application. Start with one your skin likes.

Lavender Essential Oil--it is my go-to for all things health and beauty! It's soothing properties apply to everything else I've tried, so why not my hair? I found it to be deep conditioner for hair. Plus it smells great!

Ylang-ylang Essential Oil--again, the smell! I learned that it has traditionally been used to support thick, shiny hair.
  • 1/4 Olive Oil
  • 10 drops lavender essential oil
  • 10 drops ylang-ylang essential oil  (get started with the best oils here!)
Add EO's to 2 oz dropper bottle and top with olive oil. Use a couple of drops on the ends of wet or dry hair.

Now, when I say "a couple of drops," seriously, 2 drops is enough for my hair! It is fine and straight and if I use more, it doesn't absorb all the way and looks oily. My daughter, on the other hand, has curls and 4 drops or so suits her better. I use this every time I wash my hair, on the ends only, because I believe in an ounce of prevention! I use 1-2 drops on damp hair, before blow drying, to help protect the ends from the heat, then 1-2 drops after for smoothing. 

When I use 1-2 drops after drying, I get the bonus points of lovely, calming, uplifting aromatherapy running through my hair, right there near my nose! Delightful!

After several more months, my hair is looking smooth and strong! I only hate that the weather is too hot to wear it down more often!

Wednesday, August 3, 2016

DIY Mouthwash

Mouthwash you say? Yep! This recipe is free of alcohol, sweeteners, dyes, and artificial flavors. It's so easy and cost-effective you'll never want to put that other stuff in your mouth again!

You only need 3 ingredients: baking soda, water, and top quality essential oils like these!  The essential oils do the heavy lifting here and you absolutely want to be sure you are using oils that are safe to use in your mouth! If the you have an essential oil that says "for external use only," BELIEVE THEM!

Popular oils include peppermint and the Thieves blend (which you can learn a little about here). Me? I love wintergreen! I've always preferred it to peppermint, whether it's candy or gum or whatever. But here is a great opportunity to customize it to your taste and your needs!

Add around 8 drops of each oil of choice to 1/4-1/2 tsp baking soda at the bottle of a glass bottle (mine is 8oz). Fill with water, and shake to combine!

Want a bonus secret ingredient???  Hydrogen peroxide! Based on the labeled instructions, you can use up to 50% of the 3% hydrogen peroxide with 50% water. It is well known as an antiseptic and oral debriding agent, which basically means it cleans stuff out really well. Added bonus? Whitening power! If you can tolerate the taste, it's an effective addition!

Check out my video to see how quick and easy it is to whip up a batch with my favorite oil combo!


Monday, May 30, 2016

Bath Salts

Bath Salts may be the most simple DIY out there and a staple for every beginner Essential Oil user. They are great to help you unwind from the day.  Literally, all you need is epsom salts and your favorite EO.  Epsom salts are a magnesium base which is very soothing for you physically and helps ease tension. Essential oils can have such great effects on your body and on your skin. Some are soothing, invigorating, and/or cleansing, and adding them to salts helps the oil disperse into the bath well, helping them get to you and keeping them from sitting on top of the water. Bath salts can be spiced up to cater to different needs, or to be pretty for a gift, but those are the basics.  I love mason jars for these. They are the perfect, inexpensive, large, glass vessel to house them.

For Adults:
Combine 1/2-1 cup epsom salts with 4-20 drops Essential Oil (I like 1-3 drops per ounce of salt) for a large, full bath

For Children:
Combine 1/4 cup epsom salts with 1-3 drops Essential Oil for a small bath

There are lots of variations and additives you can use to embellish your bath and lots of EO's to choose from. You could even use magnesium flakes instead of epsom salts! Both are a magnesium base.

Add up to equal parts baking soda to the epsom salts for a detox bath
Add 1-2 tsp carrier oil per 1/2 cup epsom salts for a silky, moisturizing bath
Add 1-2 tsp dried herbs per 1/2 cup epsom salts for aroma (and they are pretty in the jar!)
Add 1-2 tbsp citric acid per 1/2 cup epsom salts for fizz
Mix and match from the above, or use them all!

As for Essential Oils... there are so many to choose from it's hard to know where to start! The choice is yours and really depends on your goals. Are you looking to de-stress and unwind? Had a tough work out and looking to soothe tired muscles? Are you trying to get your kids ready for bed?  Feeling a little under the weather? A nice bath could be just what you need!

A few words of caution when choosing oils for your bath: Some oils are hot and can cause discomfort when used topically. Always use a carrier oil if you experience topical discomfort! Oil and water don't mix and rinsing with water will do you no good! In addition, peppermint has a remarkable cooling sensation that may not be enjoyable all over you in the bath! Finally, citrus oils can cause skin sensitivity in the sun when used topically. Use caution if you bathe in a citrus oil before going in the sun and cover up!

So go find a magazine or a good book, and get that tub filling! Get your oils (here!) and salts out for a good soak!

Thursday, May 19, 2016

KidCare Cream

Melrose is one of my favorite Young Living Essential Oil blends. It is made of 2 varieties of melaleuca (alternifolia, aka, tea tree, and quinquenervia), rosemary, and clove. The scent is a little spicy in my opinion. The ingredients make it very cleansing which is excellent for your skin and scalp. It's a great addition to a facewash or shampoo; I've used it for both! It's also a good choice to support your respiratory system in a chest rub or in your diffuser.
One way Melrose is part of my everyday life is in my KidCare Cream. My little girl, bless her heart, is not the kid who wants a band aid for every little thing. My girl wants oil! And this balm, specifically. It includes lavender and frankincense, 2 of the most versatile oils out there, so with all these ingredients, it really is good for everything, physical and otherwise! These all have such great cleansing and soothing properties. Plus, making a small balm makes it convenient to keep on hand all the time. Any oily person will tell you, acting fast is key when using oils. They will also tell you to use what you have on hand to the best of your ability, so I thought is best to keep the most versatile oils with me all the time! Here's what I do: 
  • Melt 1/2 teaspoon each of coconut oil and other liquid carrier oil of your choice with 1/4 teaspoon beeswax in a double boiler (I have a glass measuring cup with a handle that works nicely as a mini-double boiler)
  • Remove from the heat and cool slightly
  • Stir in 7 drops each Melrose and lavender, plus 5 drops frankincense
  • Pour in to a 5mL lip balm tin
  • Chill in the refrigerator to set (you should end up with a creamy balm, about the consistency of an ointment)

Just use a little dab, as needed, and rub it in on the wrists, temples, tummy, or directly where you feel you need it! This same combo of oils would make and nice spray for hands-off application, but I like the balm to use for emotional support. And I find the balm more convenient in my bag. My tin lives in my diaper bag and we have it on hand, literally, ALL the time! It's equally effective on nerves or a cranky mood as it is at comforting everyday little bumps. If you don't have Melrose, tea tree on its own is a nice substitution, but I really like the extra boost from the rosemary and clove.

Monday, May 2, 2016

Baby Powder

I know what you are thinking… We are not supposed to use baby powder! It’s true that in light of recent headlines, most of us are reluctant to use baby powder as adults, let alone expose our kids to it. You’d be hard pressed to find a pediatrician recommend commercial baby powder for babies anymore too. That’s because of talc. Talc or talcum powder has taken over the baby powder aisle. It has a silicon component and it is often not recommended for use around babies because of the likelihood of inhalation.

I don’t know a lot of other moms who use baby powder, but I’m a big advocate! With one caveat. I don't use talc! When my daughter was a baby, I found a number of recommendations supporting the use of cornstarch for diapering. Applying cornstarch, after using wet wipes, helps to ensure the area is completely dry before applying any creams (check out my recipe for Head-to-Toe Baby Salve!) or covering up with a diaper. You don't want any moisture trapped against the skin and creams and diapers can do this, and the creams certainly can. That is their job! They are moisture barriers! I had to look very carefully at the baby powders on the shelf to find the cornstarch one, but there is one. ONE per brand, if that!  I found it so much easier to use, just sprinkle a little on at each change, I nearly quit using creams altogether! The goal here it to keep the skin clean, dry, and healthy!

Fast forward a couple of years to baby number 2. I’ve started making a lot of products myself and thought this would be an easy one to undertake. And I was right! Now, if you are concerned about the likelihood of GMOs in cornstarch, arrowroot powder is a nice substitute (and another great argument to make it yourself!) I use it at every diaper change and my little guy has had a pretty healthy little booty ;-)

I like to add essential oils to my baby powder, but that is optional. I specifically recommend Young Living essential oils, especially for use with children, for their top quality and purity. You can learn more about getting started with Young Living HERE. For children, the smaller they are the more dilute you want the oil to be. They are very powerful! You also want to start with gentle oils that are great for skin care, like lavender, frankincense, or Gentle BabyTM blend.

So let’s get started…
I use a glass salt shaker from my local superstore. It holds about ¼ cup, or 2 ounces. For my 1 ½ year old son, I use about 1-2 drops of lavender per tablespoon of powder in this recipe. If you are just introducing your little one to oils, or your child is smaller, you can start with even less.  I like to layer in the oil with the powder, filling my jar with a ¼ teaspoon (it fits nicely inside the jar and helps make less of a mess!) A funnel would help too. I fill about a quarter of the way with your powder of choice, then add a drop of oil, then up to about half way, then another drop, and so on. Once the bottle is nearly full, I cover with a piece of masking tape, or just my hand, and give it a shake to spread the oil around. 


Finally, I add my secret weapon! I learned this trick on a cooking show. It’s popcorn kernels! I toss several in on top and they work to break up clumps and help shake the powder out. They are also too big to clog up the tiny shaker holes on the top.


So, there ya have it. Simple, safe, DIY baby powder!

PS, this is nice for adults too!
I use it after the shower on my upper thighs for the same reason I use it on my baby!
Use it in your hair roots to help matte any oily-ness in between washes. Add a little cocoa powder if you are a brunette, and a make-up brush for precise application! Tea Tree oil makes a nice addition for scalp applications.
It will also help knock off sand from your feet after the beach, no essential oil required!

See, there really is a place in your life for baby powder!